

The AI reads Stripe only for a customer whose identity is proven: a visitor
your site signed in, the sender of an email or a contact form, or someone who
confirmed their email with a code. See
how the AI knows who it is talking to.
Why a restricted key
miniDesk only reads, so it takes a restricted key with read access to five resources, and nothing else. It refuses a secret key (sk_live_…): a secret key
can refund, cancel and delete, and nothing miniDesk does needs that.
Create the restricted key
1
Open API keys in Stripe
In your Stripe dashboard, open Developers, then API keys, and choose
Create restricted key. The Open Stripe API keys button in the
miniDesk dialog takes you there.
2
Say who the key is for
Under How will you be using this key?, choose Providing this key to a
third-party application, then Continue. miniDesk is the third-party
application.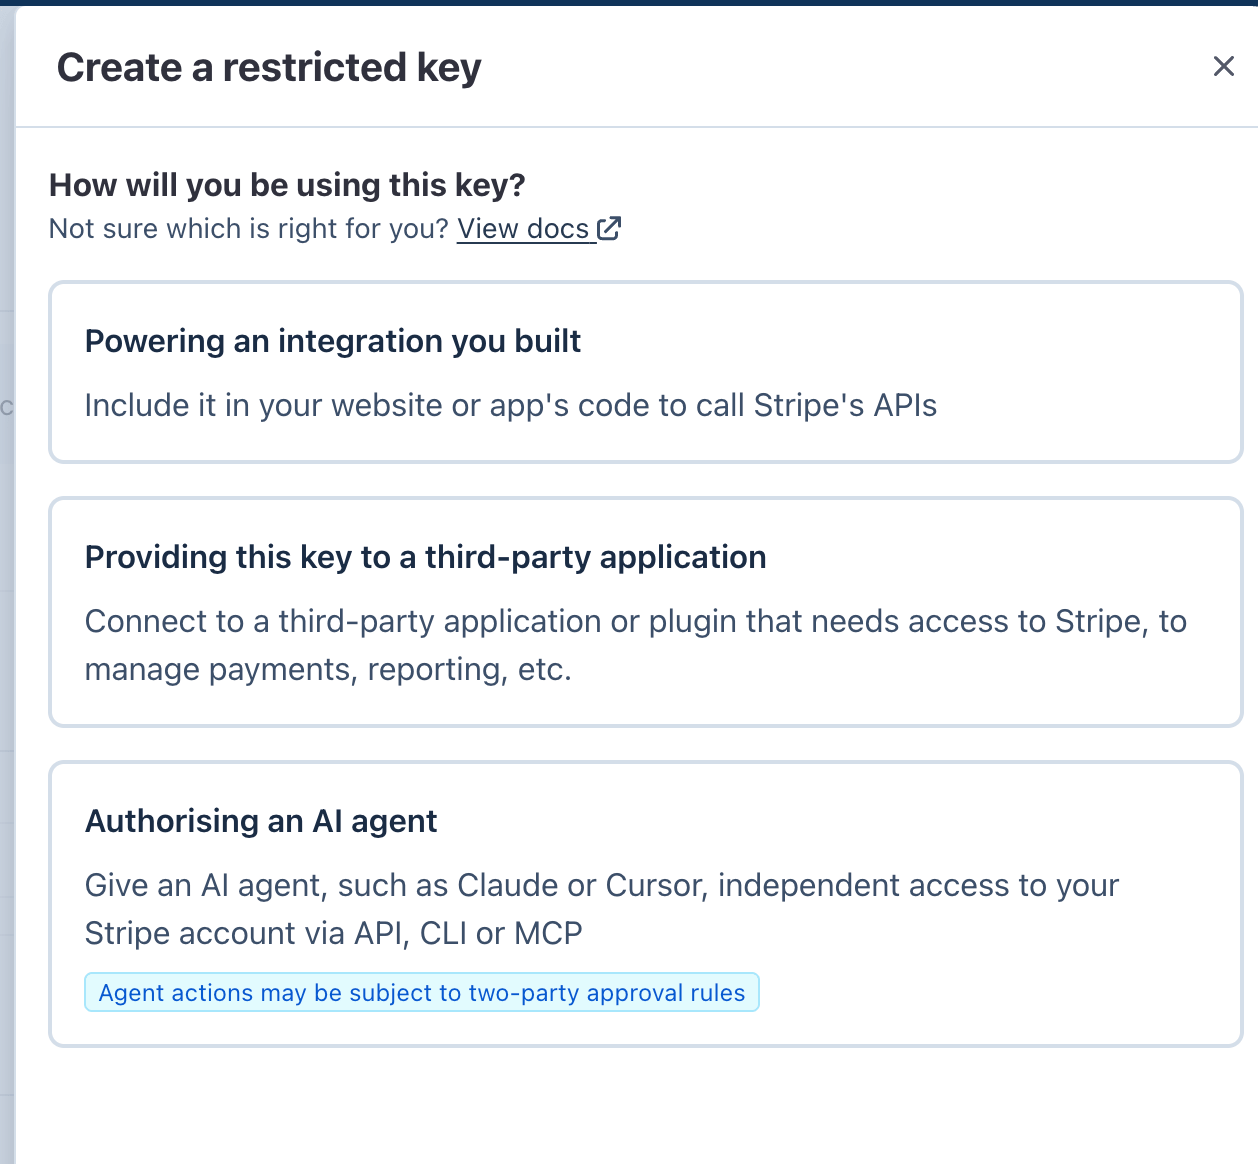
3
Name it miniDesk
Enter
miniDesk as the name and https://minidesk.ai as the URL. Stripe
shows the name in your list of keys, so you know later what the key is for.4
Give it read access to five resources
Tick Customize permissions for this key. Set these to Read:
- Customers
- Subscriptions
- Invoices
- Charges
- Products
prod_P7x….5
Create it and copy the key
Choose Create restricted key and enter the code Stripe sends you by email
or SMS. Copy the key. It starts with
rk_live_ (or rk_test_ in test mode)
and Stripe shows it only once.Connect it in miniDesk
- Go to Channels & integrations and choose Connect on the Stripe card. You need to be an owner of the workspace.
- Paste the key under Restricted key and choose Connect Stripe.
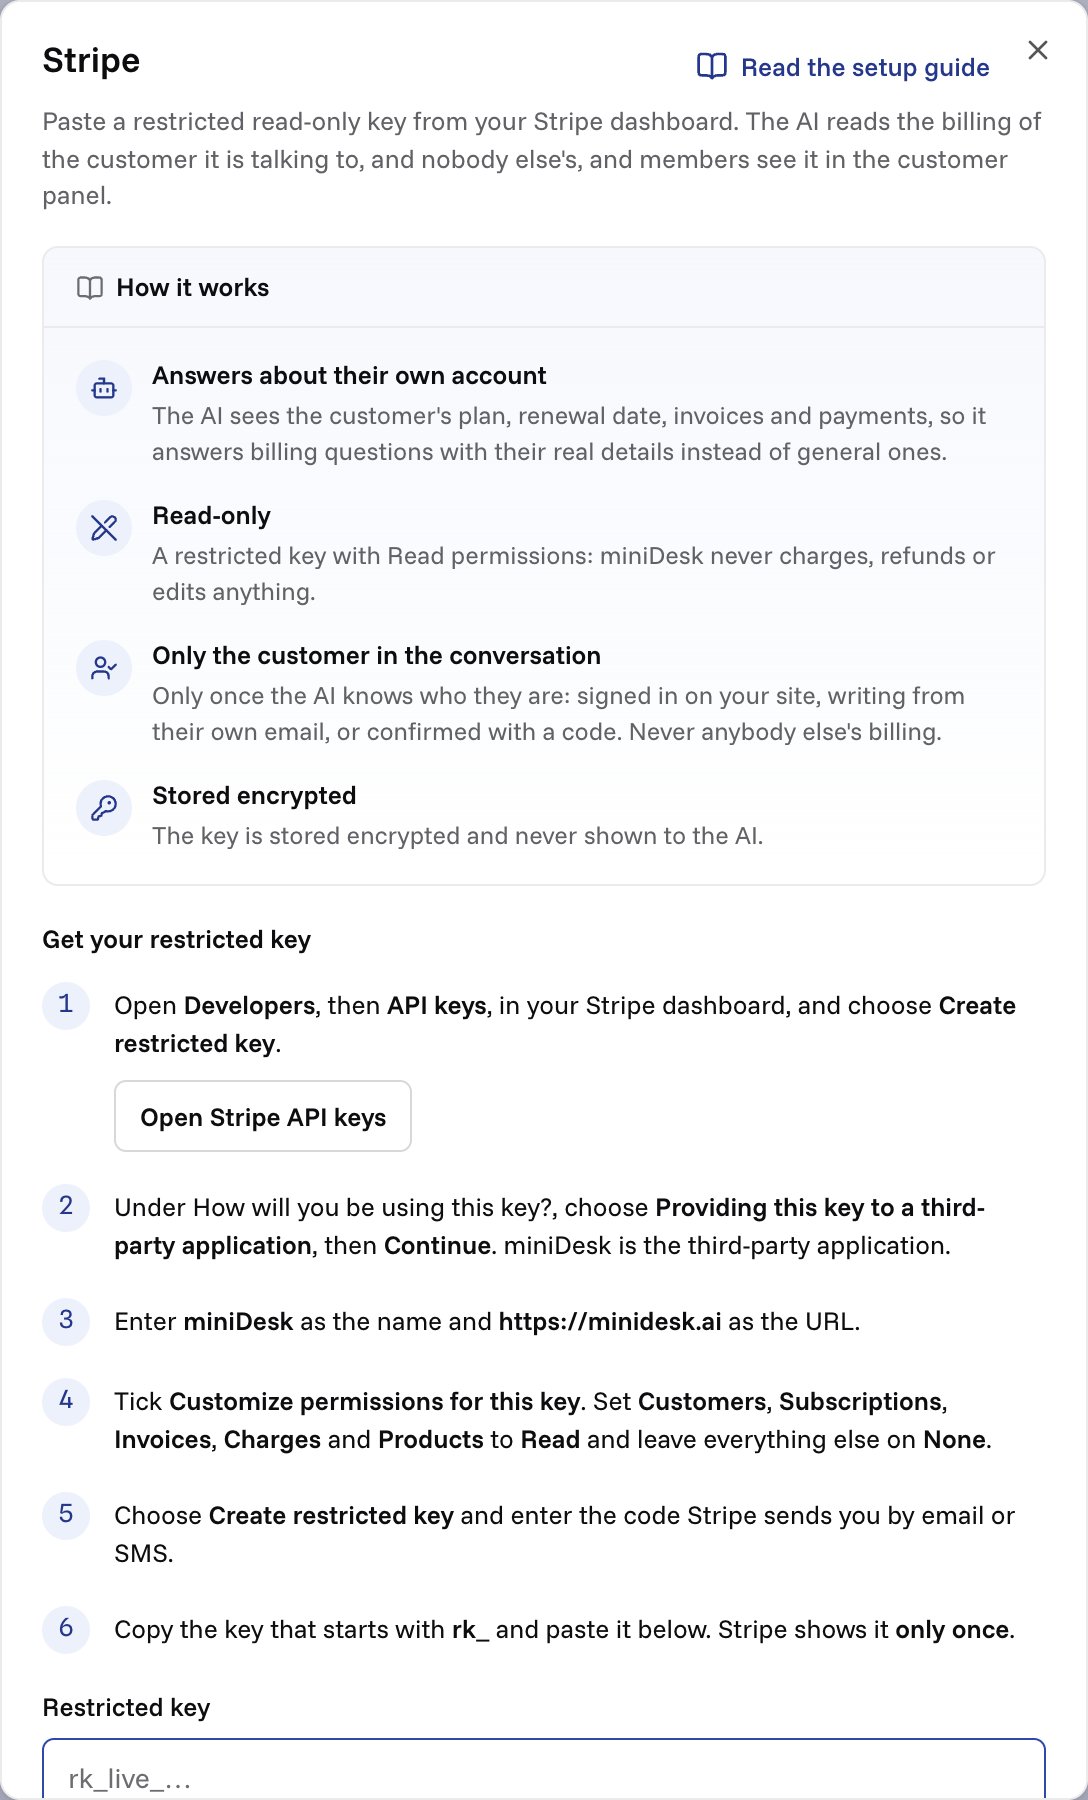
The same steps, in the Stripe dialog on Channels & integrations.
rk_test_…) sees only test customers, and a live key only live
ones. The dialog says Test mode when the key is a test key.
What the AI reads
When a proven customer asks about billing, the AI reads, for that customer only:- their subscriptions: plan, status, price, and when each renews or ends;
- their recent invoices;
- their recent payments, and whether one was refunded.
stripe_customer_id in the identity token
when you send one, and by the token’s email otherwise. When two Stripe customers
share that email, the AI reads neither and says a member can check. It never
picks one.
In the conversation panel
When Stripe is connected, the panel beside each conversation shows, under Stripe:- the customer, and since when;
- whether they have an unpaid invoice;
- their subscriptions, and when each renews or ends;
- their last five invoices, each linking to Stripe’s hosted invoice;
- their last five payments, and whether one was refunded;
- Open in Stripe, to the customer in your Stripe dashboard.
Turn it off or disconnect
On Channels & integrations, open Stripe:- Switch off Let the AI read Stripe to stop the AI’s lookups and keep the panel.
- Choose Disconnect to remove the key everywhere, the panel included. Then roll or delete the key in Stripe as well.